A family that bakes together, stays together!
Christmas is my all-time favorite holiday. In my house, we really go all out. For the whole month of December we bake, we cook, we drink, we laugh, we listen to Christmas music, and we make lots of memories. There are so many Christmas recipes to choose from out there that it makes me wish there were more days in the month so I could try them all. One thing is for sure, I will be making my famous (maybe just famous in my family haha) bacon quiche for Christmas breakfast and then I’ll try something new for dessert – cake balls! Wish me luck.
Back to my month of December traditions, I like to stalk my mailman daily. Sounds funny but I’ll tell you why. I love receiving Christmas cards from all the whole family and our friends. It’s a tradition that I hope never goes out of style. Prior to having a little family of my own, I really didn’t put much thought into Christmas cards. I used to purchase a cards pack at the store, sign my name inside and mail them. But now… I’ve definitely stepped it up. It’s my one chance to send a photo us, spread Christmas cheer and have some fun with our boys.
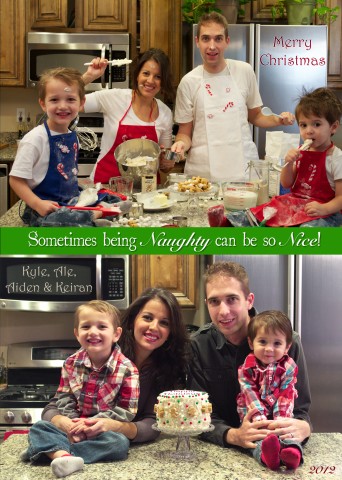
Last year we decided to do something totally different. We thought it’d be fun to do a “Naughty and Nice” theme card. I baked a little red velvet cake and between all four of us we decorated it. We used candies and Jet-Puffed marshmallows! I can’t even tell you how much fun we had. Sweetest Christmas memory ever! We had everyone calling us telling us how much they loved the card and how they still have it up even after the holidays were over because it was cute and funny. I’m already thinking of doing something awesome for our cards this year.

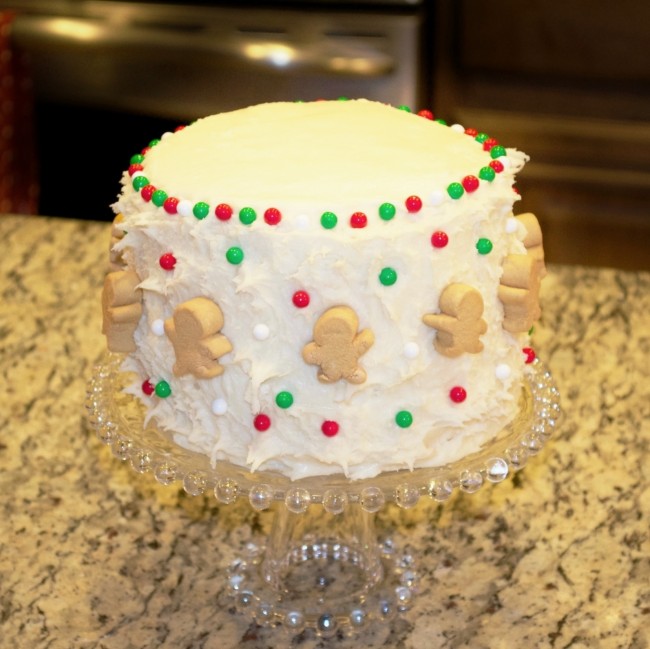
Christmas Card Picture Perfect Cake
Prep Time: 30 minutes
(not including baking or cooling time)
Serving Size: 1 slice
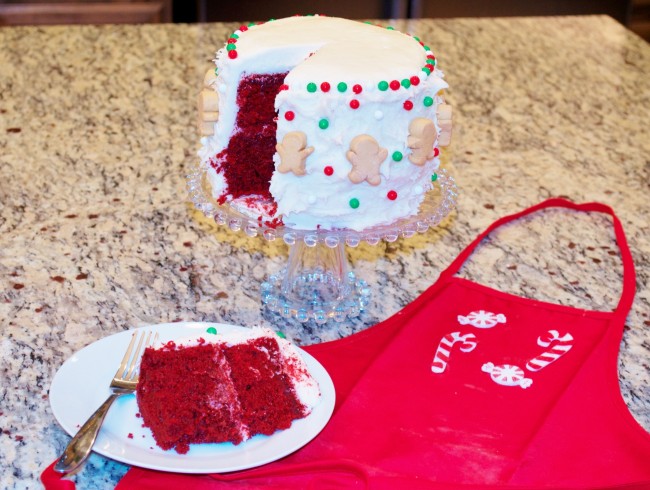
Makes: 1 – 6″ double layer cake
Ingredients
2 – 6″ round red velvet cakes, baked and cooled
1/2 cup butter, at room temperature
1 package (8 oz) PHILADELPHIA Cream Cheese, at room temperature
2 cups powder sugar, sifted
1 teaspoon vanilla extract
15 JET-PUFFED Gingerbread Mallows
Red, white, and green SweetWork’s Pearls
Directions:
Whip cream cheese, butter and vanilla in large bowl with mixer until creamy. Turn the mixer to low speed and slowly add sugar.
Place one cake layer on plate or cake stand. With spatula smear a thin layer of frosting over it and then place the second cake on top of it. Next, spread a very thin, almost transparent layer of frosting all over the cake. Place cake in freezer for 15 minutes. This is called “crumb coating” it is done prior to actually icing the cake so that it holds down the crumbs and they don’t show up on your cake’s top frosting.
Pull out cake from freezer. Using spatula, smear the rest of the icing evenly on sides and top of cake. Don’t worry too much about making the sides smooth since they’ll be covered with marshmallows and candies. Just have fun with it!
Decorate cake as you wish with candies and Jet-Puffed Gingerbread Mallows.
Enjoy within 3 hours or cover with loose plastic wrap and keep refrigerated.
To see more of my recipes for KRAFT you can visit my profile on KRAFT Foods Tastemakers HERE.
Leave a Reply