
There is no lack of inspiration for cute food, crafts and home projects during Spring and Easter.
Just look at the fun projects I’ve done right around this time in the past few years:


{Marshmallow Spring Dessert Table}

{DIY – Marshmallow Cupcake Toppers for Spring and Easter}


Although I’m not a huge fan of pastel colors and Easter decorations, I do love creating cute food, refreshing my house’s decor by adding color with flowers, reseeding my garden and purging of unnecessary “stuff”.

But let’s be real…. What I truly THE MOST excited about is all the cute Jet-Puffed Marshmallows that come out during this season –
BunnyMallows, Jumbo BunnyMallows, FunMallows and NEW this year, the Jumbo Banana Split Mallows.
I know sometimes it can be hard to find all the varieties near you which is why I’m here to show you how you can still make something super cute utilizing everyday products that are easily found at most retail and grocery stores.
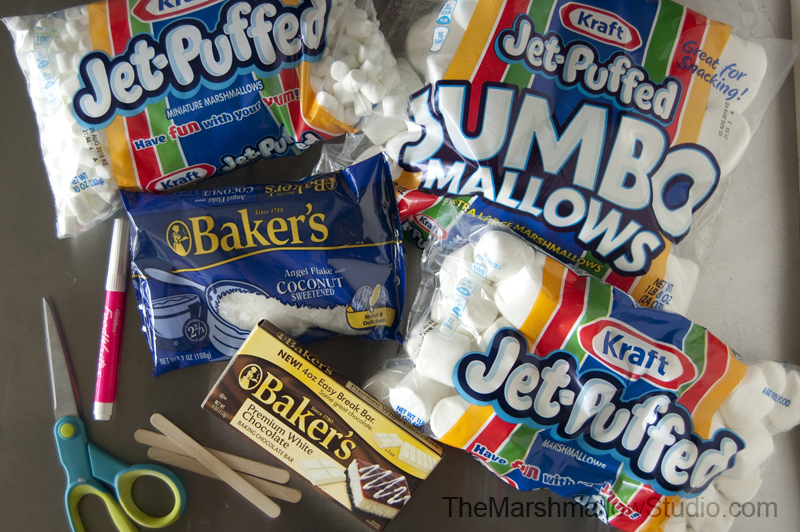
To make BUNNY BUTT MARSHMALLOW POPS you’ll need:
Jet-Puffed Jumbo Mallows
Jet-Puffed Large Marshmallows
Jet-Puffed Mini Marshmallows
Baker’s Angel Flake Coconut
Baker’s White Chocolate
a pink food marker
and a few popsicle sticks

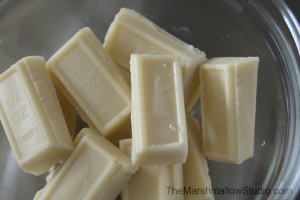
Remember to melt your chocolate in the microwave at 30 second intervals just until smooth so it doesn’t scorch.

Prep your ingredients first. I always set up my work space so that I have everything I will need ready to roll when I am.

Are you paying as much attention to this tutorial as my Little Marshmallow Kamilla is?
(She’s got her own hashtag in Instagram… check it out HERE)
Every time she sees me pull out the marshmallows, she comes at full speed and waits for me to give her some.
She loves marshmallows… Just like her momma! 🙂

So let’s get started:
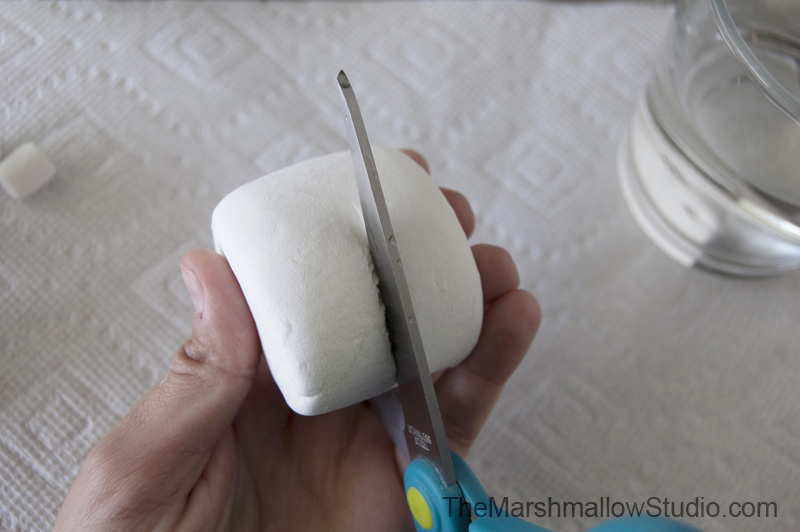
Start by cutting the Jumbo Mallows in half. Remember to wet your scissors before and after making a cut.

Next, cut a couple of Large Marshmallows in half.

Since I’m only making two for the sake of this tutorial, here are my pieces ready to be assembled.

Dip one end of the wooden stick into water and insert it to the bottom rounded side of the half Jumbo Mallow. Push the stick halfway up into the center of the marshmallow.

Scoop a bit of melted chocolate and smear it all over the marshmallow.
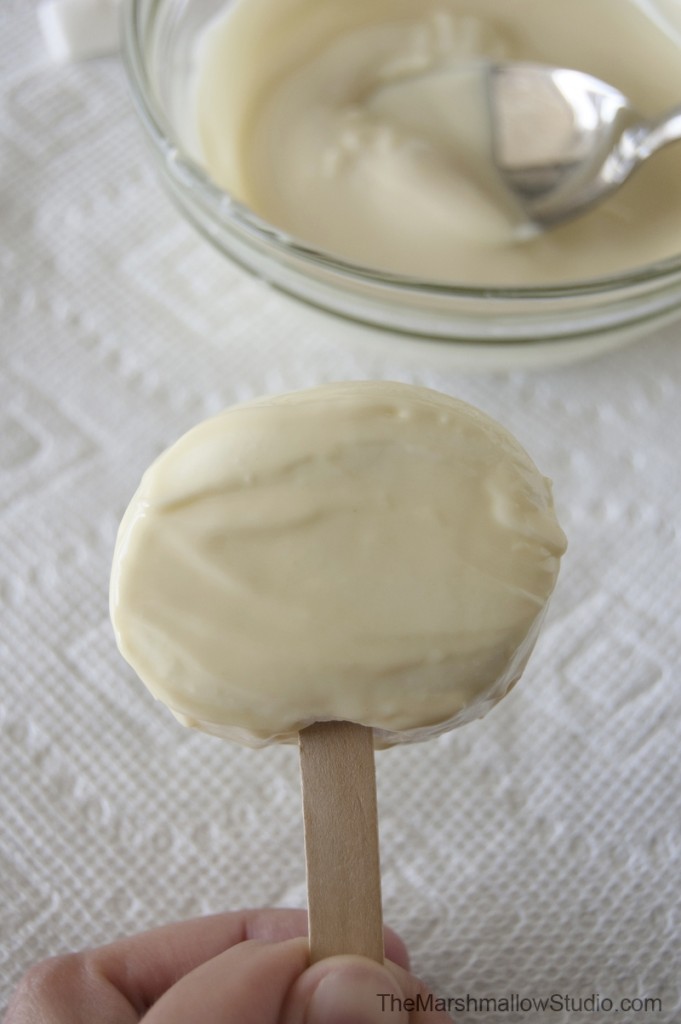
Make sure it’s completely covered with just a thin layer. If it has too much chocolate, it will drip and the coconut will fall off with it.
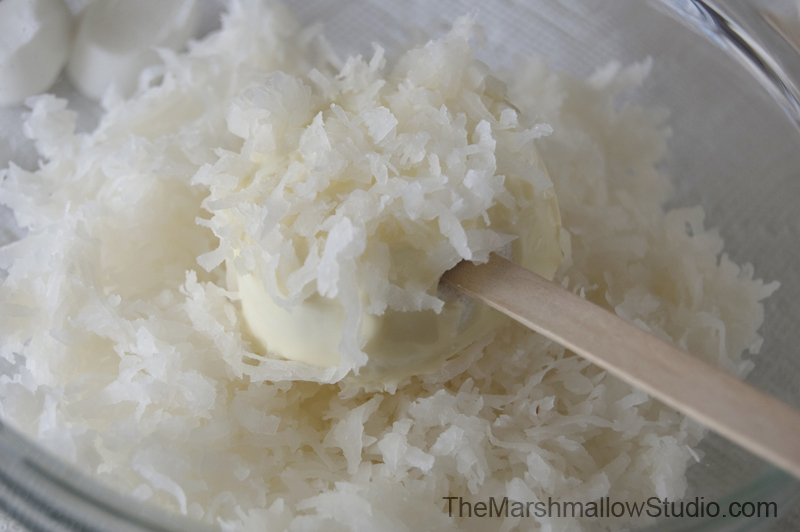
Dip the chocolate covered marshmallow pop into the coconut flakes. Gently press pop down onto coconut and make sure it’s completely covered with it.

Set aside on a piece of wax paper, parchment paper or a paper towel to harden.

Dip the tip of the Mini Marshmallow into the melted chocolate….
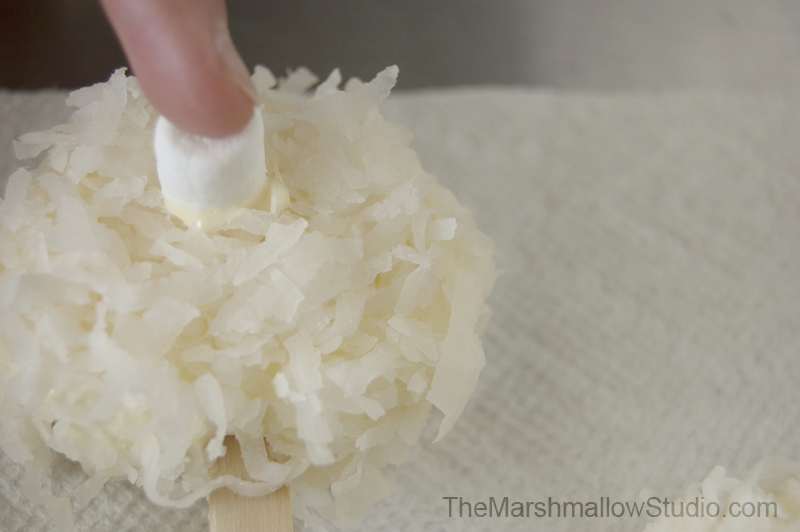
Attach it to the upper middle of the bunny butt. Gently press down with your finger. We want it to attach to the actual marshmallow not just to the loose layer of coconut on top.

Draw the bunny paws on the non-sticky sides of the halved Large Marshmallows.

If you don’t have a pink food marker you can use pink frosting, royal icing or anything similar.

Scoop a small amout of melted chocolate to one end of the sticky side of each paw.

Attach it to the bunny butt. I recommend attaching them more toward the bottom and leaving a little of the paws hanging off the butt.
Press paws down gently to make sure they attach to the marshmallow underneath the coconut.

Let them sit aside to harden for at least 45 minutes before picking them up.

DISPLAY & GIFT IDEAS:
– Wrap each pop in a cellophane bag and tie a cute ribbon bow on it.
– Insert a bunch of pops into a chocolate frosted cake covered with Oreo crumbs to look like bunnies in a carrot field.
– Great for birthdays, Easter, Spring bake sales and as a bonding activity with your little ones.
[…] Bunny Butt Marshmallow & Chocolate Pops […]